https://thebookofshaders.com/07/
The Book of Shaders
Gentle step-by-step guide through the abstract and complex universe of Fragment Shaders.
thebookofshaders.com
※ 다음 페이지를 참고하여 공부한 게시물입니다.
https://www.opentutorials.org/module/3659/22779
13. circle2 - GLSL / Shader
13. circle2 2018-10-21 18:08:15
www.opentutorials.org
Shape - fract circle
#ifdef GL_ES
precision mediump float;
#endif
uniform vec2 u_resolution;
uniform vec2 u_mouse;
uniform float u_time;
void main(){
vec2 st = gl_FragCoord.xy/u_resolution.xy;
st.x *= u_resolution.x/u_resolution.y;
vec3 color = vec3(0.0);
float d = 0.0;
// Remap the space to -1. to 1.
st = st *2.-1.;
// Make the distance field
d = length( abs(st)-.3 );
// d = length( min(abs(st)-.3,0.) );
// d = length( max(abs(st)-.3,0.) );
// Visualize the distance field
gl_FragColor = vec4(vec3(fract(d*10.0)),1.0);
// Drawing with the distance field
// gl_FragColor = vec4(vec3( step(.3,d) ),1.0);
// gl_FragColor = vec4(vec3( step(.3,d) * step(d,.4)),1.0);
// gl_FragColor = vec4(vec3( smoothstep(.3,.4,d)* smoothstep(.6,.5,d)) ,1.0);
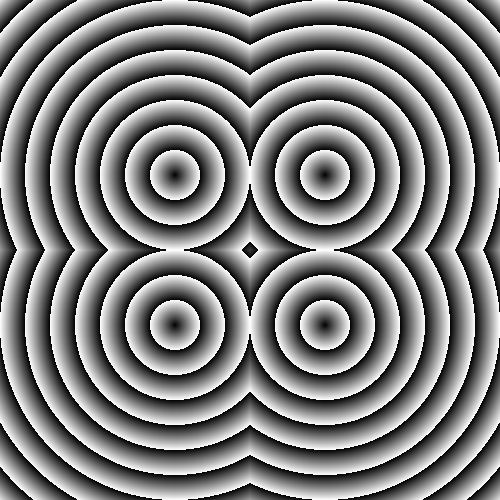
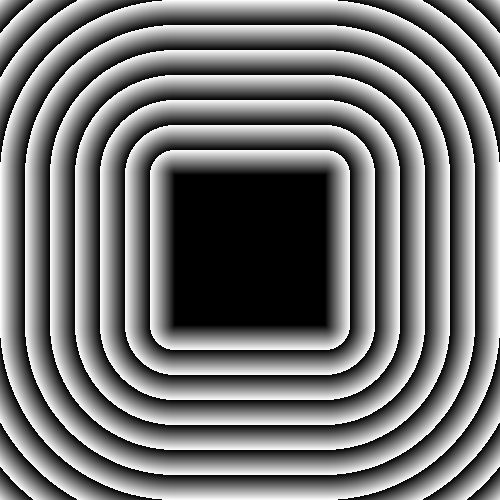
}위 코드는 그림처럼 4 개의 파동 모양을 그려내는 코드인데 얼핏 보면 상당히 복잡하다.
vec2 st = gl_FragCoord.xy/u_resolution.xy;
st.x *= u_resolution.x/u_resolution.y;
대표적으로 위 코드는 x 해상도에서 y 해상도를 나누면 y 해상도에 대해서 x 해상도가 몇 배나 큰 지 혹은 작은지 그 배숫값이 나오게 될 것이다. 이 값을 st.x 에 곱해주는 것으로 가로 화면 해상도가 변함에 따라 단위 픽셀당 담아야하는 실제 화면의 길이를 조정해준다.
따라서 이렇게 가로길이가 변하더라도 그에 맞게 해상도가 조절된다.
차근차근 코드를 작성해보자.
#ifdef GL_ES
precision mediump float;
#endif

uniform vec2 u_resolution;
uniform vec2 u_mouse;
uniform float u_time;

void main(){
    vec2 coord = gl_FragCoord.xy/u_resolution.xy;
    coord.x *= u_resolution.x/u_resolution.y;

    coord = coord*2. - 1.;

    vec2 point = vec2(.3);

    float d = distance(abs(coord), point);

    vec3 col = vec3(d);

    gl_FragColor = vec4(col, 1.);
}
coord 좌표를 2배로 늘리고 1을 뺌으로써 (0,0)을 화면의 중심으로 옮긴다.
이게 무슨 말이냐 처음에는 이해가 잘 안되었는데, coord에 2배를 하면 가로세로 2배 길이가 늘어난다 그 상태에서 1만큼 빼게되면 x,y 각각 - 방향으로 1만큼 이동한 화면을 보여준다는 뜻으로 이해하면 된다. 그러면 원점이 딱 화면에 중앙에 놓인다.

그리고 point변수를 (0.3, 0.3)위치에 지정하고, 이 point로부터 떨어져있는 coord 위치별 distance값을 color로 넣는다. point와 일치하면 거리가 0이고 멀어질수록 1에 가까워지므로 중심의 검은색에서 퍼져나가면서 흐릿해지는 형태가 된다.
여기서 coord에 abs를 통해 절댓값을 씌웠기 때문에 원점을 중심으로 각 사분면의 위치에서 vec2(.3)에 해당하는 point마다 이 모양이 나오게 된다.

#ifdef GL_ES
precision mediump float;
#endif

uniform vec2 u_resolution;
uniform vec2 u_mouse;
uniform float u_time;

void main(){
    vec2 coord = gl_FragCoord.xy/u_resolution.xy;
    coord.x *= u_resolution.x/u_resolution.y;

    coord = coord*2. - 1.;

    vec2 point = vec2(.3);

    float d = distance(abs(coord), point);
    // d = mod(d*10., 1.);
    d = fract(d*10.);

    vec3 col = vec3(d);

    gl_FragColor = vec4(col, 1.);
}
distance를 10배로 곱하여서 1로 나누는 로직이 추가되자 물결 모양이 생겼다.

distance를 10배로 곱하면 이렇게 원이 작아지기만 하는데, 이는 나머지 범위에서는 이미 distance가 1을 넘어갔기 때문이다. 검은색이 보이려면 0~1사이의 값이어야하는데, 0~1사이의 값 즉 소수점으로 표현하기 위해서 mod()로 몫을 1로 나누거나 fract()를 이용하면 가능하다.
fract(d * 10.) 코드를 이용해서 10배만큼 범위를 확장시킨 다음 1로 나눈 나머지들은 0에서 1까지 가까워졌다가 다시 0에서 1까지 가까워지는 소수값의 반복이므로 위와같은 파장 모양이 형성된다.
처음 코드의 주석처리 된 부분들을 한 번 알아보자.
#ifdef GL_ES
precision mediump float;
#endif
uniform vec2 u_resolution;
uniform vec2 u_mouse;
uniform float u_time;
void main(){
vec2 st = gl_FragCoord.xy/u_resolution.xy;
st.x *= u_resolution.x/u_resolution.y;
vec3 color = vec3(0.0);
float d = 0.0;
// Remap the space to -1. to 1.
st = st *2.-1.;
// Make the distance field
// d = length( abs(st)-.3 );
d = length( min(abs(st)-.3,0.) );
// d = length( max(abs(st)-.3,0.) );
// Visualize the distance field
gl_FragColor = vec4(vec3(fract(d*10.0)),1.0);
// Drawing with the distance field
// gl_FragColor = vec4(vec3( step(.3,d) ),1.0);
// gl_FragColor = vec4(vec3( step(.3,d) * step(d,.4)),1.0);
// gl_FragColor = vec4(vec3( smoothstep(.3,.4,d)* smoothstep(.6,.5,d)) ,1.0);
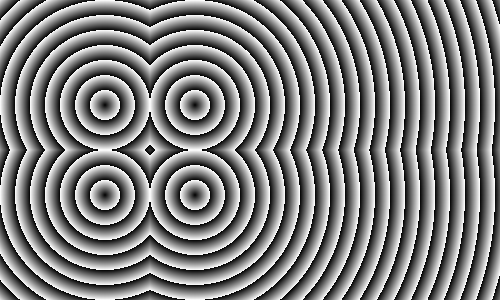
}distancen로 들어가는 값인 length(min(abc(st)-.3,0.))를 보면 다른 점은 min값으로 x,y좌표 각각 0보다 값이 작은 음수 좌표만이 반환되고 나머지는 0으로 반환된다는 점이다. 그래서 각 사분면의 (0.3, 0.3) 기준으로 vec2(.3)을 빼면 음수가 나오는 범위 즉 (0.3, 0.3) point로부터 원점까지의 범위만이 그려지고 나머지 부분은 경계선 색이 일정하다.
색이 주욱 늘어지는 효과를 보이는 이유는 파동이 그려지는 범위의 x,y 값 중 하나의 값은 0~1 사이의 음수값이 나와서 distance에 색이 반영되지만 나머지 하나의 좌표값이 .3을 넘어가서 -0.3을 했을 때 0보가 커지기 때문에 x,y 중 하나의 값만이 색으로 반영된채 유지되기 때문이다.
#ifdef GL_ES
precision mediump float;
#endif
uniform vec2 u_resolution;
uniform vec2 u_mouse;
uniform float u_time;
void main(){
vec2 st = gl_FragCoord.xy/u_resolution.xy;
st.x *= u_resolution.x/u_resolution.y;
vec3 color = vec3(0.0);
float d = 0.0;
// Remap the space to -1. to 1.
st = st *2.-1.;
// Make the distance field
// d = length( abs(st)-.3 );
// d = length( min(abs(st)-.3,0.) );
d = length( max(abs(st)-.3,0.) );
// Visualize the distance field
gl_FragColor = vec4(vec3(fract(d*10.0)),1.0);
// Drawing with the distance field
// gl_FragColor = vec4(vec3( step(.3,d) ),1.0);
// gl_FragColor = vec4(vec3( step(.3,d) * step(d,.4)),1.0);
// gl_FragColor = vec4(vec3( smoothstep(.3,.4,d)* smoothstep(.6,.5,d)) ,1.0);
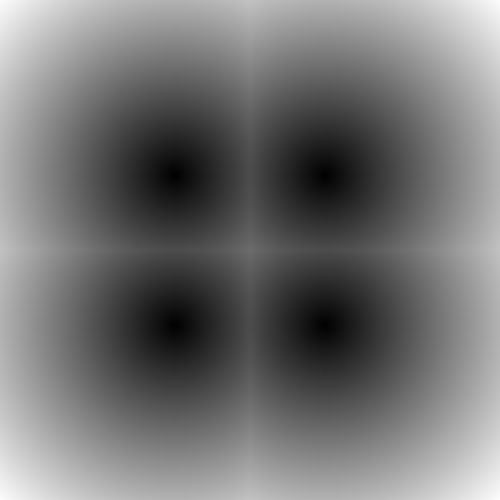
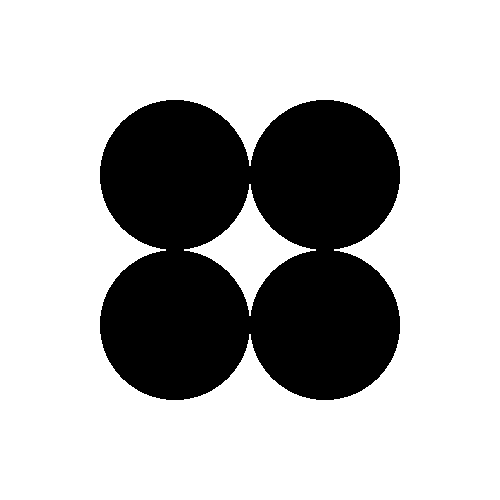
}이번에는 위와 반대로 max를 이용하였기 때문에 각 사분면의 (0.3, 0.3)보다 큰 위치만 파동무늬가 생성되고, 그 내부의 값은 x,y 값 둘 다 distance가 0보다 작기 때문에 (0,0)이 되어 검은색으로 나온다.
#ifdef GL_ES
precision mediump float;
#endif

uniform vec2 u_resolution;
uniform vec2 u_mouse;
uniform float u_time;

void main(){
  vec2 st = gl_FragCoord.xy/u_resolution.xy;
  st.x *= u_resolution.x/u_resolution.y;
  vec3 color = vec3(0.0);
  float d = 0.0;

  // Remap the space to -1. to 1.
  st = st *2.-1.;

  // Make the distance field
  d = length( abs(st)-.3 );
  // d = length( min(abs(st)-.3,0.) );
  // d = length( max(abs(st)-.3,0.) );

  // Visualize the distance field
  gl_FragColor = vec4(vec3(fract(d*10.0)),1.0);

  // Drawing with the distance field
  gl_FragColor = vec4(vec3( step(.3,d) ),1.0);
  // gl_FragColor = vec4(vec3( step(.3,d) * step(d,.4)),1.0);
  // gl_FragColor = vec4(vec3( smoothstep(.3,.4,d)* smoothstep(.6,.5,d)) ,1.0);
}
이번에는 파동무늬가 아니라 다른 무늬가 형성되었다.
코드를 보면 fract()가 아니라 step을 사용하여 0.3을 기준으로 distance를 0또는 1로 나누었다. 따라서 (0.3, 0.3)의 안쪽은 모두 vec3(0), 바깥쪽은 vec3(1)이 되어 위와 같은 모양이 나온다.
#ifdef GL_ES
precision mediump float;
#endif
uniform vec2 u_resolution;
uniform vec2 u_mouse;
uniform float u_time;
void main(){
vec2 st = gl_FragCoord.xy/u_resolution.xy;
st.x *= u_resolution.x/u_resolution.y;
vec3 color = vec3(0.0);
float d = 0.0;
// Remap the space to -1. to 1.
st = st *2.-1.;
// Make the distance field
d = length( abs(st)-.3 );
// d = length( min(abs(st)-.3,0.) );
// d = length( max(abs(st)-.3,0.) );
// Visualize the distance field
gl_FragColor = vec4(vec3(fract(d*10.0)),1.0);
// Drawing with the distance field
// gl_FragColor = vec4(vec3( step(.3,d) ),1.0);
gl_FragColor = vec4(vec3( step(.3,d) * step(d,.4)),1.0);
// gl_FragColor = vec4(vec3( smoothstep(.3,.4,d)* smoothstep(.6,.5,d)) ,1.0);
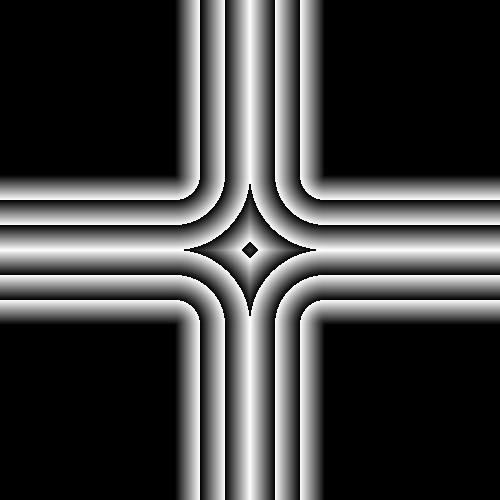
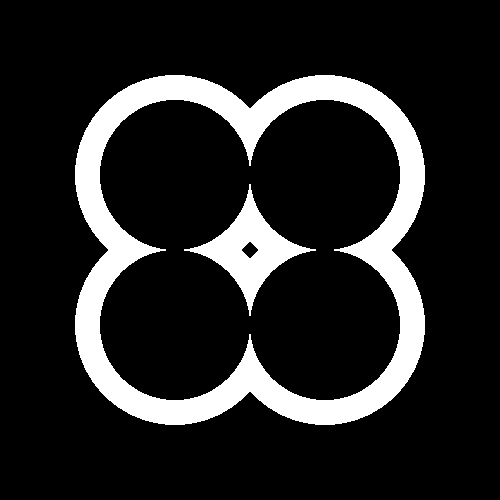
}위 무늬는 step()값을 서로 곱하여 특정 부분만 띠가 생기게 하였다.
step(.3,d)로 0.3 범위 안은 검게, 밖은 흰색으로 만들었다면, 거기에 step(d, .4)를 곱한다. step(d, .4)는 distance가 0~.4 사이 값일 경우 1을, .4보다 큰 경우 0을 반환하는데, 이렇게 곱해지면 point (0.3, 0.3)점으로부터 0.1만큼의 두께 까지는 흰색으로 나오다가 그 이후에 step(d, .4)로 인해 0이 곱해지므로 다시 검은 색이 되어 위와 같은 무늬가 발생한다.

#ifdef GL_ES
precision mediump float;
#endif

uniform vec2 u_resolution;
uniform vec2 u_mouse;
uniform float u_time;

void main(){
  vec2 st = gl_FragCoord.xy/u_resolution.xy;
  st.x *= u_resolution.x/u_resolution.y;
  vec3 color = vec3(0.0);
  float d = 0.0;

  // Remap the space to -1. to 1.
  st = st *2.-1.;

  // Make the distance field
  d = length( abs(st)-.3 );
  // d = length( min(abs(st)-.3,0.) );
  // d = length( max(abs(st)-.3,0.) );

  // Visualize the distance field
  gl_FragColor = vec4(vec3(fract(d*10.0)),1.0);

  // Drawing with the distance field
  // gl_FragColor = vec4(vec3( step(.3,d) ),1.0);
  // gl_FragColor = vec4(vec3( step(.3,d) * step(d,.4)),1.0);
  gl_FragColor = vec4(vec3( smoothstep(.3,.4,d)* smoothstep(.6,.5,d)) ,1.0);
}
해당 코드는 이전 코드에서 뭔가 흐려진 느낌을 준다.
실제 코드상으로도 step에서 smoothstep으로 변경되어 smooth한 범위를 0.1 범위만큼 지정해준 것이 차이점이다.
'개발 · 컴퓨터공학' 카테고리의 다른 글
| GLSL - cross translate 십자가 위치 변환 (1) | 2023.03.01 |
|---|---|
| GLSL - shape circle clover (or windmill) 클로버 혹은 바람개비 모양 (0) | 2023.02.28 |
| GLSL - qualifier, shape squre, shape circle (0) | 2023.02.24 |
| SIGGRAPH 시그라프 겉핥기 - A Biologically Inspired Hair Aging Model (0) | 2023.02.23 |
| GLSL - color와 atan 함수 (0) | 2023.02.22 |


