https://thebookofshaders.com/12/
The Book of Shaders
Gentle step-by-step guide through the abstract and complex universe of Fragment Shaders.
thebookofshaders.com
※ 다음 페이지를 참고하여 공부한 게시물입니다.
https://www.opentutorials.org/module/3659/26004
23. Voronoi (마지막 강) - GLSL / Shader
번외편 물체의 표면에 빛을 쬐였을때 어떤 색을 발하게 되는가를 사실적으로 표현하고자 하는 일이야 말로 Shader가 존재하는 궁극적인 목적이며 Graphics연구의 꽃이라 생각합니다. 따라서 손에
www.opentutorials.org
Cellular Noise (Voronoi)
// Author: @patriciogv
// Title: 4 cells DF

#ifdef GL_ES
precision mediump float;
#endif

uniform vec2 u_resolution;
uniform vec2 u_mouse;
uniform float u_time;

void main() {
    vec2 st = gl_FragCoord.xy/u_resolution.xy;
    st.x *= u_resolution.x/u_resolution.y;

    vec3 color = vec3(.0);

    // Cell positions
    vec2 point[5];
    point[0] = vec2(0.83,0.75);
    point[1] = vec2(0.60,0.07);
    point[2] = vec2(0.28,0.64);
    point[3] =  vec2(0.31,0.26);
    point[4] = u_mouse/u_resolution;

    float m_dist = 1.;  // minimum distance

    // Iterate through the points positions
    for (int i = 0; i < 5; i++) {
        float dist = distance(st, point[i]);

        // Keep the closer distance
        m_dist = min(m_dist, dist);
    }

    // Draw the min distance (distance field)
    color += m_dist;

    // Show isolines
    // color -= step(.7,abs(sin(50.0*m_dist)))*.3;

    gl_FragColor = vec4(color,1.0);
}
세포 모양을 가지고, 마우스를 움직이면 마우스의 위치를 따라 세포가 움직이는 형태를 만들어보자.

#ifdef GL_ES
precision mediump float;
#endif

uniform vec2 u_resolution;
uniform vec2 u_mouse;
uniform float u_time;

void main(){
    vec2 coord = gl_FragCoord.xy/u_resolution;
    coord.x *= u_resolution.x/u_resolution.y;

    vec2 mouse = u_mouse/u_resolution;
    mouse.x *= u_resolution.x/u_resolution.y;

    const int num = 5;
    vec2 cells[num];
    cells[0] = vec2(0.);
    cells[1] = vec2(0.230,0.810);
    cells[2] = vec2(0.660,0.610);
    cells[3] = vec2(0.880,0.180);
    cells[4] = mouse;

    float md = 100.;
    vec2 picked_cell;
    for(int i=0; i<num; ++i){
        float d = distance(cells[i], coord);
        if(d < md){
            md = d;
            picked_cell = cells[i];
        }
    }

    // vec3 col = vec3(picked_cell, abs(sin(md*100.)));
    vec3 col = vec3(md);
    gl_FragColor = vec4(col, 1.0);
}
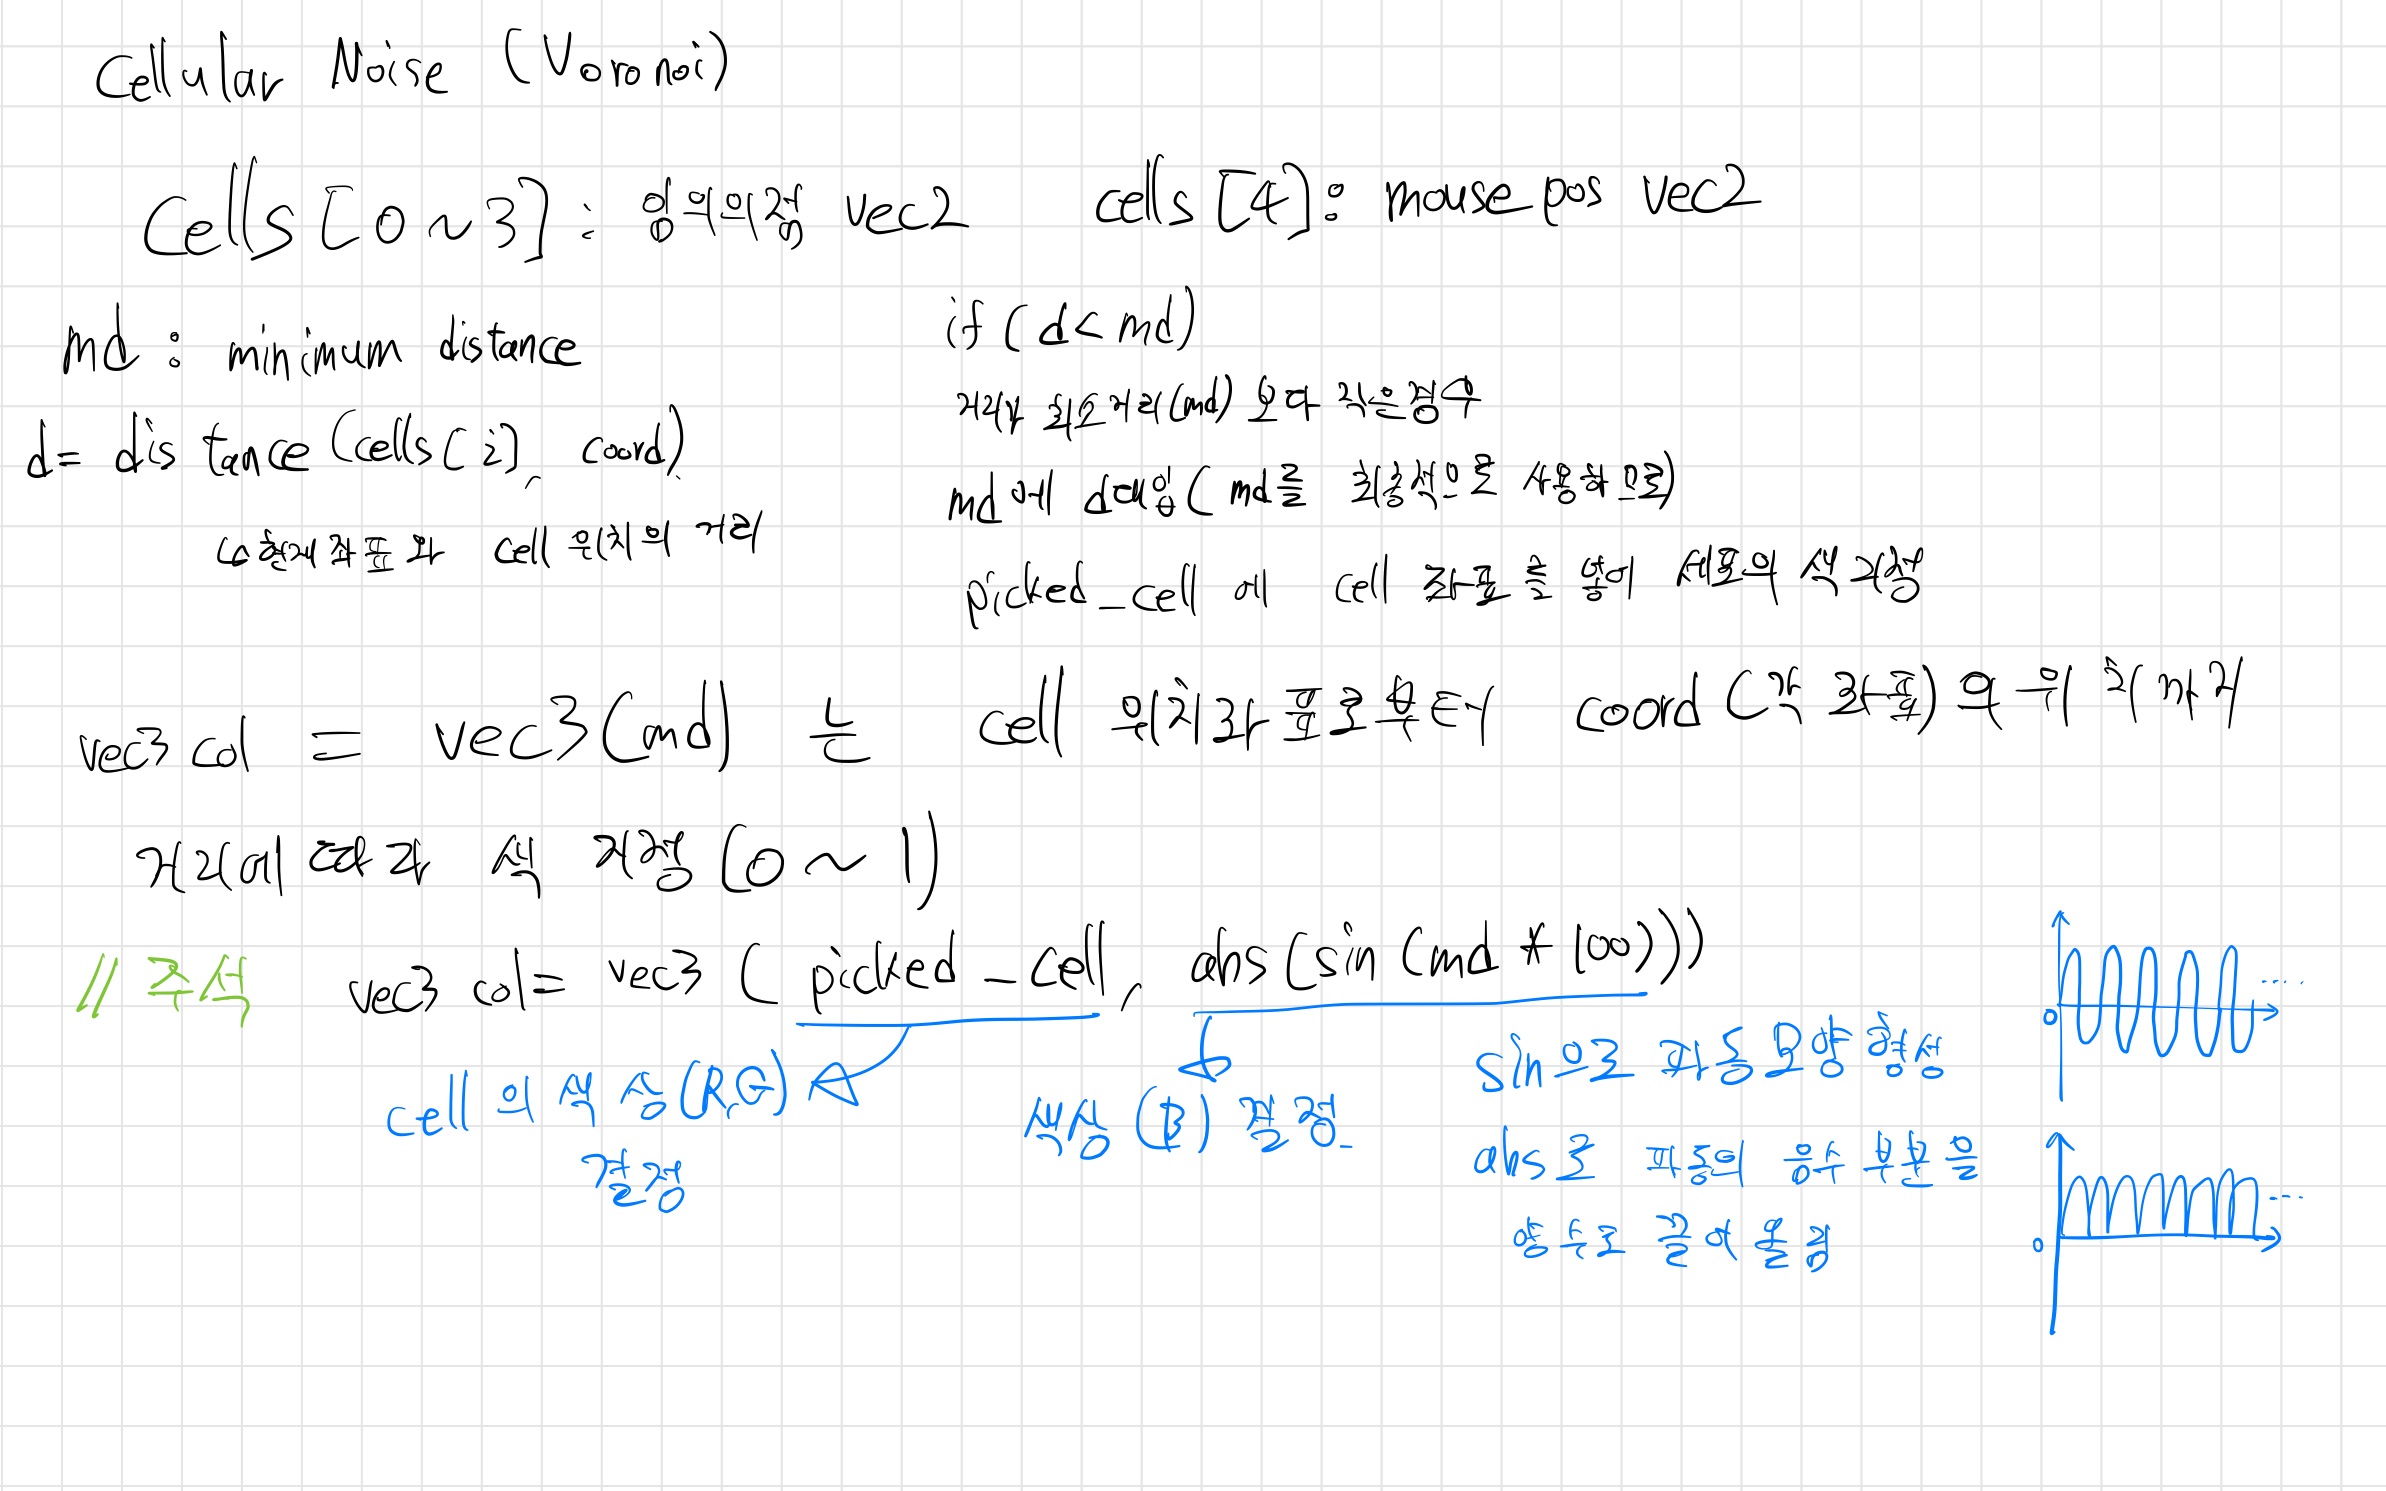
cells 리스트에 세포의 위치 좌표를 넣고, 하나는 mouse의 pos에 따라 움직이도록 mouse pos vec2를 넣었다.
최소 거리를 정하여 coord 좌표와 더 가까운 세포에 속하도록 (좌표 픽셀이 가장 가까운 세포의 색을 표현할 수 있도록) 한다.
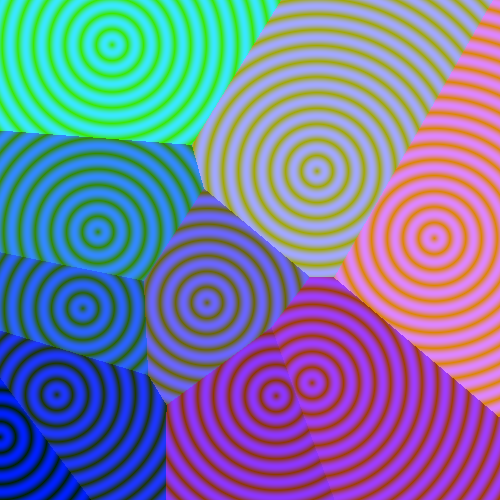
주석된 col 코드와 바꾸어 md를 100배로, abs, sin을 적용하고, picked cell색상을 지정하면 위 그림처럼 바뀐다.
앞선 코드에서 cell의 number를 지정하는 만큼 자동으로 생성되도록 해보자.
#ifdef GL_ES
precision mediump float;
#endif

uniform vec2 u_resolution;
uniform vec2 u_mouse;
uniform float u_time;

vec2 random(float f){
    float x = fract(sin(f*36.346)*1652.12124);
    float y = fract(cos(f*2407.125)*2105.12569);
    return vec2(x, y);
}

void main(){
    vec2 coord = gl_FragCoord.xy/u_resolution;
    coord.x *= u_resolution.x/u_resolution.y;

    vec2 mouse = u_mouse/u_resolution;
    mouse.x *= u_resolution.x/u_resolution.y;

    const int num = 10;
    vec2 cells[num];

    for(int i=0; i<num-1; ++i){
        cells[i] = random(float(i));
    }
    cells[num-1] = mouse;

    float md = 100.;
    vec2 picked_cell;
    for(int i=0; i<num; ++i){
        float d = distance(cells[i], coord);
        if(d < md){
            md = d;
            picked_cell = cells[i];
        }
    }

    vec3 col = vec3(picked_cell, abs(sin(md*100.)));
    // vec3 col = vec3(md);
    gl_FragColor = vec4(col, 1.0);
}
각 cells element에 random 함수를 이용해서 random한 위치에 세포를 생성하였다.
#ifdef GL_ES
precision mediump float;
#endif

uniform vec2 u_resolution;
uniform vec2 u_mouse;
uniform float u_time;

vec2 random(float f){
    float x = fract(sin(f*36.346)*1652.12124);
    float y = fract(cos(f*2407.125)*2105.12569);
    return vec2(x, y);
}

void main(){
    vec2 coord = gl_FragCoord.xy/u_resolution;
    coord.x *= u_resolution.x/u_resolution.y;

    vec2 mouse = u_mouse/u_resolution;
    mouse.x *= u_resolution.x/u_resolution.y;

    const int num = 10;
    vec2 cells[num];

    for(int i=0; i<num-1; ++i){
        cells[i] = random(float(i));
    }
    cells[num-1] = mouse;

    float md = 100.;
    vec2 picked_cell;
    for(int i=0; i<num; ++i){
        float d = distance(cells[i], coord);
        if(d < md){
            md = d;
            picked_cell = cells[i];
        }
    }

    vec3 col = md<0.01 ? vec3(1.) : vec3(md);
    gl_FragColor = vec4(col, 1.0);
}
md를 거리에 따라 구분하면 특정 거리 안에있는 모양은 세포핵으로 표현할 수 있다.
위 코드의 경우 cell의 개수를 100개 1000개 늘리면 점점 느려진다. 하지만 이를 최적화하는 방법이 있다.
#ifdef GL_ES
precision mediump float;
#endif
uniform vec2 u_resolution;
uniform vec2 u_mouse;
uniform float u_time;
vec2 random(vec2 c_){
float x = fract(sin(dot(c_, vec2(75.8, 48.6)))*1e5);
float y = fract(sin(dot(c_, vec2(85.8, 108.6)))*1e5);
vec2 returnVec = vec2(x,y);
returnVec = returnVec * 2. - 1.;
return returnVec;
}
float noise(vec2 coord){
vec2 i = floor(coord);
vec2 f = fract(coord);
f = f*f*f*(f*(f*6.-15.)+10.);
// y = x*x*(3.0-2.0*x); -> smoothstep과 같은 모양
// y = x*x*x*(x*(x*6.-15.)+10.); -> 기존 smoothstep보다 좀더 스무스
float returnVal = mix(mix(dot(random(i), coord-i),
dot(random(i+vec2(1., 0.)), coord-(i+vec2(1., 0.))),
f.x),
mix(dot(random(i+vec2(0., 1.)), coord-(i+vec2(0., 1.))),
dot(random(i+vec2(1., 1.)), coord-(i+vec2(1., 1.))),
f.x),
f.y
);
return (returnVal); // return value range -1 ~ 1
}
vec2 noiseVec2(vec2 coord){
float time_Speed = 0.3;
float time_diff = dot(coord.x, coord.y);
coord += u_time * time_Speed + time_diff;
// below 2 line is moving code
return vec2(noise((coord+vec2(10.550, 71.510))),
noise((coord+vec2(-710.410, 150.650))) );
// return range -1 ~ 1
}
vec2 random(float f){
float x = fract(sin(f*1306.346)*1652.12124);
float y = fract(cos(f*2407.125)*2105.12469);
return vec2(x,y); // 0~1
}
void main(){
vec2 coord = gl_FragCoord.xy/u_resolution;
coord *= 10.;
coord.x *= u_resolution.x/u_resolution.y;
vec2 coord_i = floor(coord);
vec2 coord_f = fract(coord);
float md = 100.;
for(float y = -1.; y < 2.; ++y){
for(float x = -1.; x < 2.; ++x){
vec2 center = coord_i + vec2(x,y) + vec2(0.5);
vec2 temp = noiseVec2(center);
vec2 cell = center + temp;
float d = distance(coord, cell);
if(d<md){
md = d;
}
}
}
vec3 col = vec3(md);
gl_FragColor = vec4(col, 1.0);
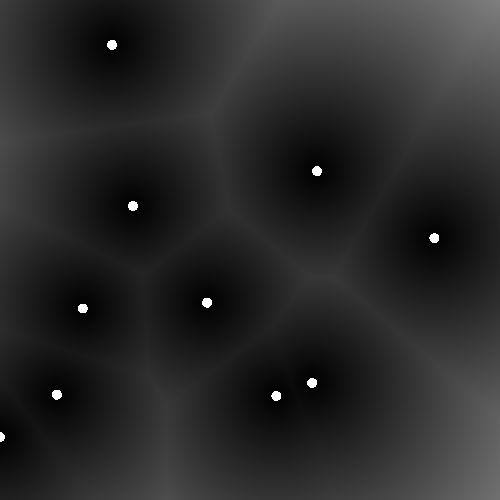
}이렇게 자동으로 움직이는 세포들을 그리면
coord 값을 늘려서 수많은 cell을 만들어도 느려지지 않고 같은 복잡도 안에서 해결된다.
이해가 잘 안되서 다시 살펴보았다.
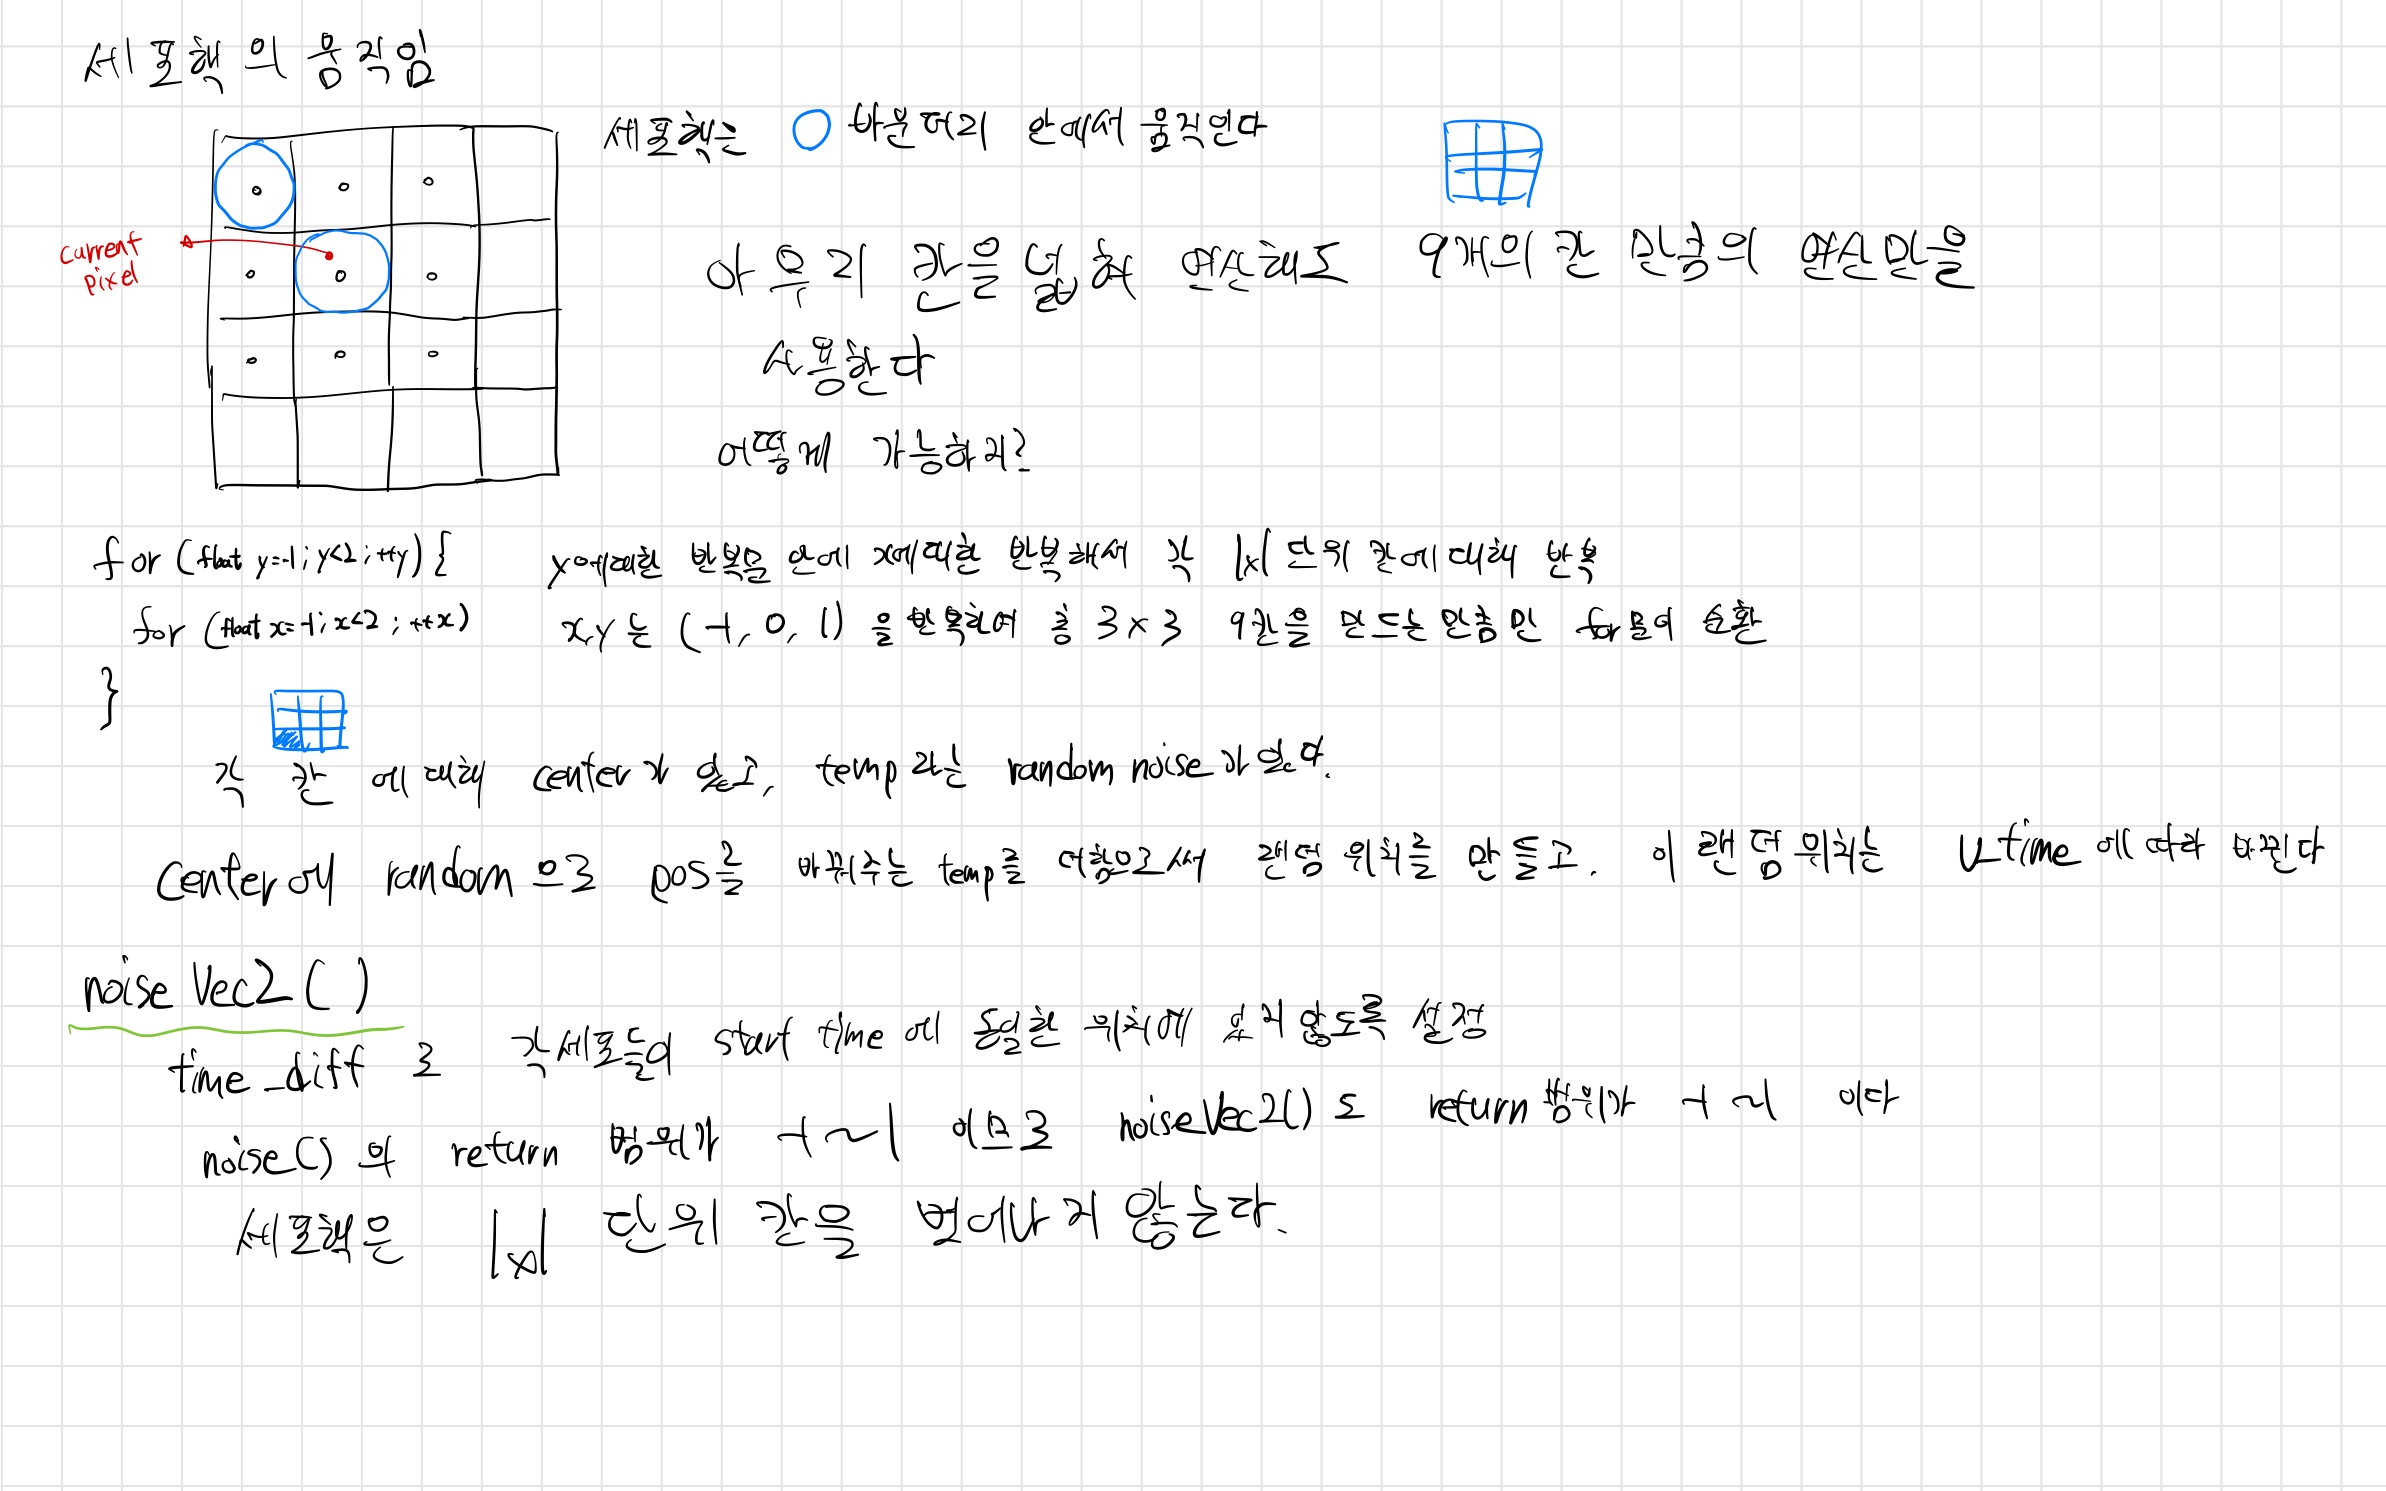
세포핵은 자신이 속한 칸 안에서만 움직이고, 아무리 coord값을 높혀도 loop 9번의 연산으로 끝난다고 한다. 이유가 뭘까?
코드를 보면 이중 for문으로 (-1, 0, 1)을 x,y 가 각각 반복하여 9칸을 만들고, 나머지들은 이것들이 반복해서 만들어지는 듯 하다. 반복은 하지만 각 coord값에 따라서 다른 랜덤 값이 들어가므로 움직임이나 위치는 제각각이다.
각 칸에 대해 center가 있고, random noise값 temp를 더한다. 이 랜덤위치는 시간에 따라 변한다.
noiseVec2()에서는 time_diff로 각 세포들이 start time에 동일한 위치에서 시작하지 않도록 해주고, return 범위가 -1 ~ 1이므로 세포핵은 1x1 단위 칸을 벗어나지 못하는 것 같다.
'개발 · 컴퓨터공학' 카테고리의 다른 글
| [Capstone Project] template를 useState에 넣을 때 발생하는 issue (0) | 2023.03.29 |
|---|---|
| [Capstone Project] template 변경하기 issue (0) | 2023.03.28 |
| [Capstone Project] template 모델 부위별 따로 생성하기 / position 옮기기 & 모델 분리 / slider 분리 적용 (1) | 2023.03.24 |
| [Capstone Project] adjust_value JSON / color 및 texture 적용방식 변환필요 (0) | 2023.03.23 |
| GLSL - Gradient Noise 기울기 노이즈 (0) | 2023.03.22 |


