
PhysicsObject
이전에 preSolve, solve, postSolve에 대해서 보았으니 나머지 물리 시뮬레이션에 필요한 기능을 보자
update vertex normals
vertex normal은 mesh가 눈에 보여질 때 주로 사용된다
gpuCanvas.device.queue.writeBuffer(
  meshBuffers.position.data,
  0,
  cloth.positions,
  0,
  meshBuffers.position.length
);
gpuCanvas.device.queue.writeBuffer(
  meshBuffers.normals.data,
  0,
  cloth.normals,
  0,
  meshBuffers.normals.length
);
여기서는 cloth 객체의 vertex normal을 buffer에 담아서 render queue에 전달하여 어느면을 렌더링 할지를 정해준다
하지만 본래 carmen씨의 코드는 webGPU기반으로 작성되어있다
threejs를 사용하는 환경에서는 normal 성분이 없어도 mesh 정보만으로 렌더링 타입을 정할 수 있어서 실질적으로 개발할 때는 따로 처리할 부분이다
그렇다면 간단히만 보고 가도록 하자
  updateVertexNormals() {
    for (let i = 0; i < this.numParticles; i++) {
      vecSetZero(this.normals, i);
    }
    for (let i = 0; i < this.numParticles; i++) {
      const id0 = this.indices[3 * i];
      const id1 = this.indices[3 * i + 1];
      const id2 = this.indices[3 * i + 2];

      const e0 = [0, 0, 0];
      const e1 = [0, 0, 0];
      const c = [0, 0, 0];

      // Find Area of Triangle
      // Calculate edge vectors from id0
      vecSetDiff(e0, 0, this.positions, id1, this.positions, id0);
      vecSetDiff(e1, 0, this.positions, id2, this.positions, id0);

      // Area of triangle 1/2 |AB x AC|
      vecSetCross(c, 0, e0, 0, e1, 0);

      vecAdd(this.normals, id0, c, 0, 0.333);
      vecAdd(this.normals, id1, c, 0, 0.333);
      vecAdd(this.normals, id2, c, 0, 0.333);
    }
  }
우선 초기화를 하고 나면 particle 세 개 로 이루어진 삼각형의 두 edge를 가져온다
이때 삼각형의 세 vertex의 index를 활용한다
삼각형의 두 edge로 외적벡터를 구하면
이를 vertex 별로 크기를 나누어서 할당해준다
여기도 역질량을 구할 때와 마찬가지로
한 vertex에 다른 삼각형이 겹치는데 이때 겹치는 모든 삼각형 mesh의 normal 합을 담는다
Cloth Physics Object
physics object class에 들어있는 공통적인 부분을 모두 다루었다
이제는 cloth physics에만 할당된 기능들을 보자
export class ClothPhysicsObject extends PhysicsObject {
  thickness: number;
  hash: Hash;
  constructor(mesh: Mesh, thickness: number) {
    super(mesh);
    this.thickness = thickness;

    // Spacing calculated by looking into the obj file and seeing the length between two particles.
    const spacing = thickness;
    this.hash = new Hash(spacing, this.numParticles);
  }

  ...
기본 physics object를 상속받은 cloth physics는 hash table과 옷의 두께인 thickness를 가진다
preIntegration
  preIntegration(dt: number) {
    this.hash.create(this.positions);
    this.hash.queryAll(this.positions, ((1 / 60) * 0.2 * this.thickness) / dt);
  }
preintegration 단계에서는 hash table을 생성하고
모든 particle에 대해서 query를 실행하여 인접 particle에 대한 id들을 정리해놓는다
hash query에 대한 자세한 설명은 이전에 다루었던 포스팅을 참고하자
아마 cloth의 경우 유체처럼 particle의 인접관계가 바뀌지 않으므로
query는 preIntegration에서 한 번만 수행하는 것이다
register constraint collision
  /**
   * Adds a DistanceConstraint to the Cloth physics object
   * @param compliance
   */
  public registerDistanceConstraint(compliance: number) {
    this.constraints.push(
      this.constraintFactory.createDistanceConstraint(compliance)
    );
  }
constraint를 등록할 때 compliance 즉 탄력성 상수를 input으로 입력한다
그러면 constraint factory에서 필요한 constraint를 생성 후 반환해서 constraints 배열에 넣는다
두 가지 의문
왜 굳이 constraints가 배열일 필요가 있는지와
각 constraint를 등록하는 함수들을 따로 만들었는지가 있다
constraint 등록 함수가 따로 있는 이유
이건 main 함수에서 cloth 객체가 어떻게 constraint 등록 함수를 호출하는지 보면 된다
cloth.registerDistanceConstraint(0.0);
cloth.registerPerformantBendingConstraint(1.0);
cloth.registerSelfCollision();
// cloth.registerIsometricBendingConstraint(10.0)
보면 알겠지만 compliance 상수들의 값이 다 다르다
collision의 경우는 compliance가 없다
constraints가 배열인 이유
constraints 배열은 어디에 사용되냐?
physicsObject의 solve 함수가 정의된 모양을 보자
  solve(dt: number) {
    for (let i = 0; i < this.numParticles; i++) {
      // Floor collision ( we currently don't have a need for it)
      let y = this.positions[3 * i + 1];
      const height = -0.7;
      if (y < height) {
        vecCopy(this.positions, i, this.prevPositions, i);
        this.positions[3 * i + 1] = height;
      }
    }
    for (const constraint of this.constraints) {
      constraint.solve(dt);
    }

    for (const collision of this.collisions) {
      collision.solve(dt);
    }
  }
solve 함수에서는 각 constraints와 collisions를 매 deltatime마다 순회하는 식으로 호출한다
이렇게 사용하려고 배열인 것이다
  /**
   * Adds a PerformantBendingConstraint to the Cloth physics object
   * @param compliance
   */
  public registerPerformantBendingConstraint(compliance: number) {
    this.constraints.push(
      this.constraintFactory.createPerformantBendingConstraint(compliance)
    );
  }

  /**
   * Adds an IsometricBendingConstraint to the Cloth physics object
   * @param compliance
   */
  public registerIsometricBendingConstraint(compliance: number) {
    this.constraints.push(
      this.constraintFactory.createIsometricBendingConstraint(compliance)
    );
  }

  /**
   * Adds a Self Collision constraint to the Cloth physics object
   */
  public registerSelfCollision() {
    this.collisions.push(
      new ClothSelfCollision(
        this.positions,
        this.prevPositions,
        this.invMass,
        this.thickness,
        this.hash
      )
    );
  }
나머지 constaints와 collision도 같은 맥락으로
constraints / collisions 배열에 push 한다
각 constraint를 생성할 때 사용되는 compliance는 서로 다르게 넣을 수 있는데
constraint에 따라 다르게 설정하면 조절되는 효과를 추후 알아볼 수 있겠다
Cloth class
cloth simulation과 관련된 마지막 스크립트로
cloth physics object를 상속 받은 cloth class
export default class Cloth extends ClothPhysicsObject {
  constructor(mesh: Mesh, thickness: number) {
    super(mesh, thickness);
    this.init();
  }

  ...
이 cloth class로 생성한 객체를 가지고 main 함수에서 시뮬레이션을 처리한다
cloth class가 독단적으로 하는 역할은 initialize밖에 없다
  private init() {
    // Set top of cloth to have a mass of 0 to hold still
    // in order to get hanging from clothesline visual
    {
      // Variables to store top row
      let minX = Number.MAX_VALUE;
      let maxX = -Number.MAX_VALUE;
      let maxY = -Number.MAX_VALUE;

      for (let i = 0; i < this.numParticles; i++) {
        minX = Math.min(minX, this.positions[3 * i]);
        maxX = Math.max(maxX, this.positions[3 * i]);
        maxY = Math.max(maxY, this.positions[3 * i + 1]);
      }

      // Thickness of the edge to zero out(?)
      const eps = 0.000001;

      for (let i = 0; i < this.numParticles; i++) {
        const x = this.positions[3 * i];
        const y = this.positions[3 * i + 1];
        if (y > maxY - eps && (x < minX + eps || x > maxX - eps))
          // if (y > maxY - eps)
          this.invMass[i] = 0.0;
      }
    }
  }
상단에 적힌 주석 내용을 보면
Set top of cloth to have a mass of 0 to hold still
in order to get hanging from clothesline visual
옷의 최상단 한 줄은 빨랫줄처럼 고정되어서 시뮬레이션 되어야하기 때문에
질량을 0으로 고정시킨다는 말이다
  // Variables to store top row
  let minX = Number.MAX_VALUE;
  let maxX = -Number.MAX_VALUE;
  let maxY = -Number.MAX_VALUE;

  for (let i = 0; i < this.numParticles; i++) {
    minX = Math.min(minX, this.positions[3 * i]);
    maxX = Math.max(maxX, this.positions[3 * i]);
    maxY = Math.max(maxY, this.positions[3 * i + 1]);
  }
그래서 minX, maxX, maxY 세 개의 limit 수를 지정해서
position의 가장 끝 부분들을 담는다
(minxY는 이미 solve에서 floor colllision을 구현했으므로 필요 없다)
  // Thickness of the edge to zero out(?)
  const eps = 0.000001;

  for (let i = 0; i < this.numParticles; i++) {
    const x = this.positions[3 * i];
    const y = this.positions[3 * i + 1];
    if (y > maxY - eps && (x < minX + eps || x > maxX - eps))
      // if (y > maxY - eps)
      this.invMass[i] = 0.0;
  }
particle의 x,y 위치가 min / max 범위 이상으로 넘어가면
해당 particle의 역질량을 0으로 설정한다
근데 이게 모든 particle을 순회하면서 가장 윗단에 있는 particle을 찾는 방식인 것 같다
if 조건을 보면
y값은 최상단에 있으면서 x에 대한 조건도 있는데
x에 대한 조건은 뭐지? 하는 생각을 하고 있었다
고민중...
뒤늦게서야 이해했다
거의 0에 가까운 값인 eps가 하는 역할은 max, min보다 아주 조금 덜미치는 값을 설정해서
y축의 최상단에 있으면서, x축의 양쪽 끝에 있는 두 개의 particle만을 찾기 위함이었다
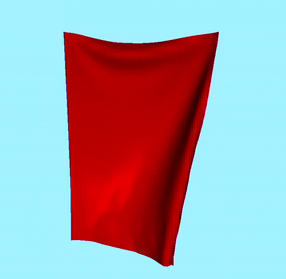
양쪽 끝 두 particle의 역질량을 0 즉 질량을 무한대로 만들어 고정시켜서
마치 옷에 빨래집게를 집어놓은 듯한 효과를 준다
이제 구현 단계로 넘어가자
cloth simulation에 들어가는 물리 시뮬레이션 관련 코드들을 모두 숙지했다
이제 이 webGPU기반 코드를 threejs로 포팅해서 테스트 해보도록 하자


